Short Answer
Get started in 7 steps: create an Amazon Seller account, verify your phone and address, request a GTIN exemption, set up shipping, connect Amazon to PODtomatic, set your brand name and daily upload limit, then connect CustomCat and Laser Chili for fulfillment. Welcome to PODtomatic! This system makes it easy to create and upload print-on-demand products to your Amazon account.
Before You Begin
Make sure you have:
- An Amazon Seller account — required to list and sell products on Amazon
- A PODtomatic account — log in here if you already have one
- CustomCat and Laser Chili accounts — your print-on-demand suppliers for fulfillment
Step-by-Step Setup Guide
Step 1: Sign Up for an Amazon Seller Account
First things first, you need an Amazon Seller account. If you don't have one yet, click here to sign up.
There's a monthly fee of $39.99 for the Amazon Pro Seller account, but it's worth it for all the features you'll get. It might take a few days for Amazon to verify your information, so be patient.
Step 2: Verify Your Phone and Address
After signing up, you must verify your phone number and address. Failure to do so will prevent your products from being sold on Amazon.
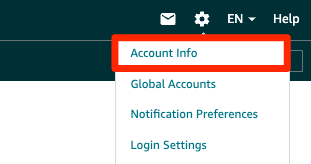
- Navigate to the Settings page on Amazon.
- Go to Account Info > Business Information > Business Address and Phone Number, or use this direct verification link.
Amazon will send you a postcard with a verification code. Once received, enter this code into your Amazon account to verify your address. Upon successful verification, you'll see the message "Address Verified Successfully."
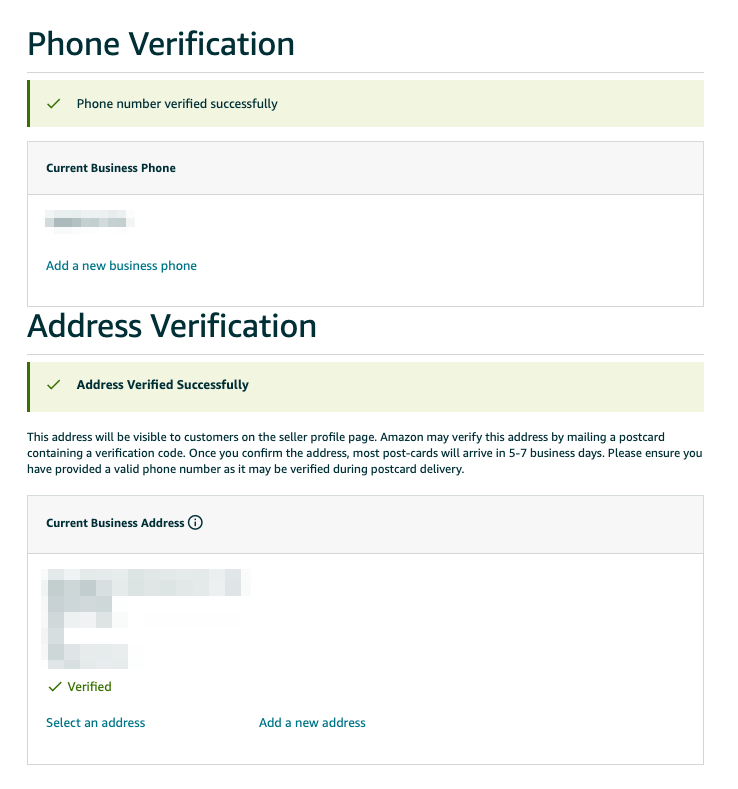
You can continue with other steps while awaiting the postcard from Amazon.
Step 3: Request a GTIN Exemption from Amazon
Once your Amazon Seller account is set up, request a GTIN exemption. This allows you to list products without providing a unique product identifier (UPC). Learn how to request a GTIN exemption here.
Step 4: Set Up Shipping on Amazon
Go to the General Shipping Settings page and set the Default Shipping Address to either the CustomCat or Laser Chili address.
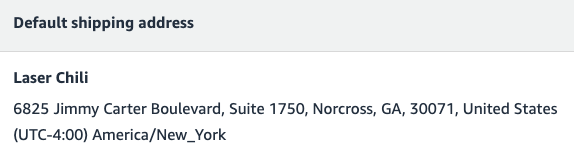
You can use the following addresses:
- CustomCat: 1300 Rosa Parks Blvd, Detroit, MI 48216, United States
- Laser Chili: 6825 Jimmy Carter Boulevard, Suite 1750, Norcross, GA 30071, United States
Make sure to use a US address; otherwise, the transit time for your products will be long, and not many people want to buy a product with a lengthy transit time.
After setting the Default Shipping Address, go to the Shipping Templates page. Select "Migrated Template" and check that the transit time is under 7 days.
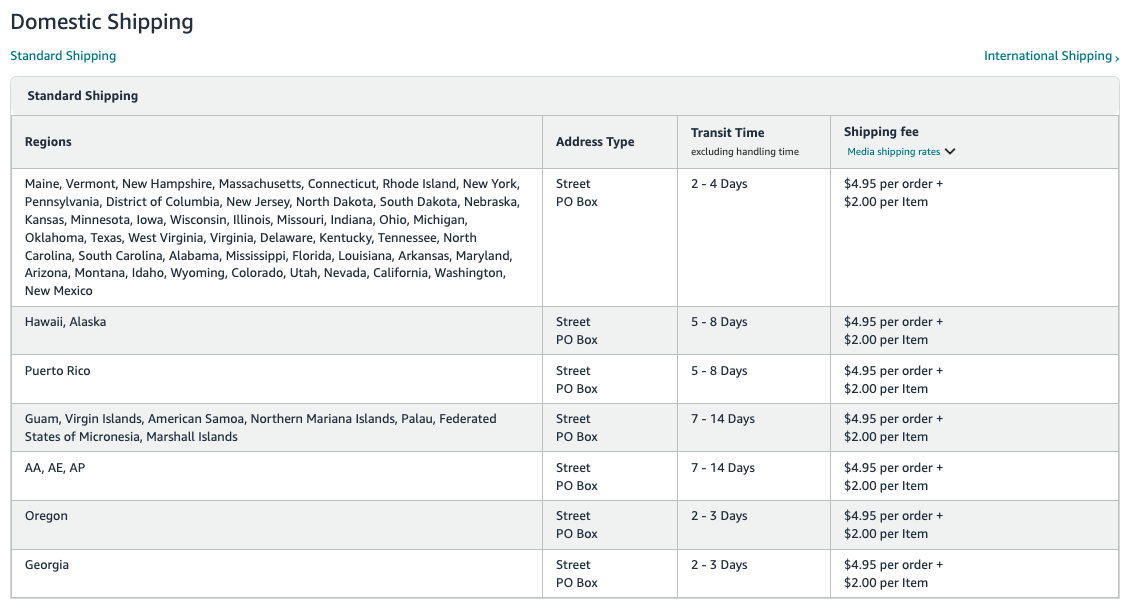
Then adjust the shipping fees as you wish. For example, you might charge $4.95 per order and $2 per item.
Step 5: Connect Amazon to PODtomatic
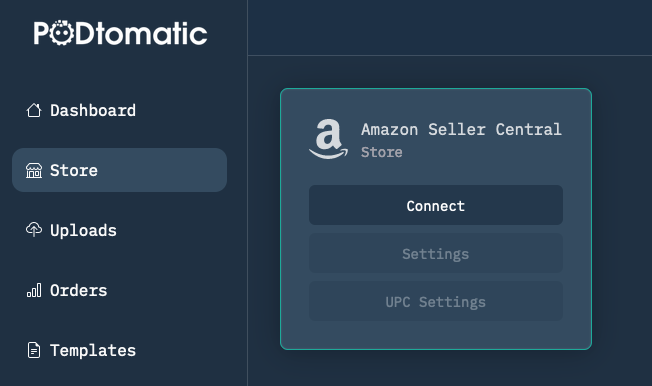
- Click "Connect" and follow the instructions to connect your Amazon account to PODtomatic.
- Click the "Test Post" button to ensure PODtomatic can upload products smoothly to your Amazon account.
Step 6: Set the Brand Name and Daily Upload Limit
After connecting your Amazon account, go to the "Settings" section.
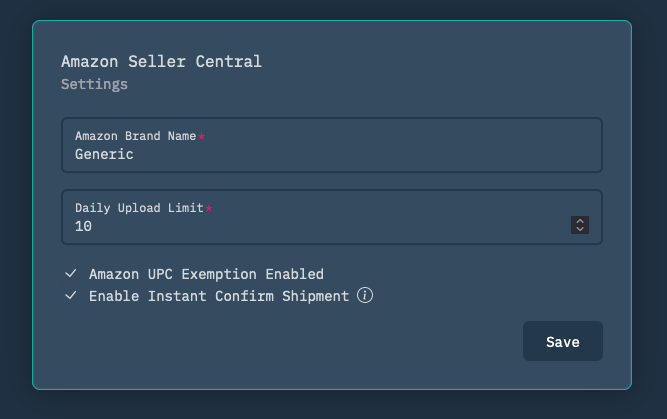
- Amazon Brand Name: if you don't have a registered brand name, enter "Generic." If you have a registered brand name, use your own.
- Daily upload limit: sets how many products are uploaded to Amazon each day. Start with 5-10 products per day for new accounts and increase up to 200 products per day for established accounts.
- Check "Amazon UPC Exemption Enabled" if you've already applied for the GTIN exemption from Amazon.
- Check "Enable Instant Confirm Shipment" if you want the system to confirm the shipment on Amazon immediately after placing the order (recommended).
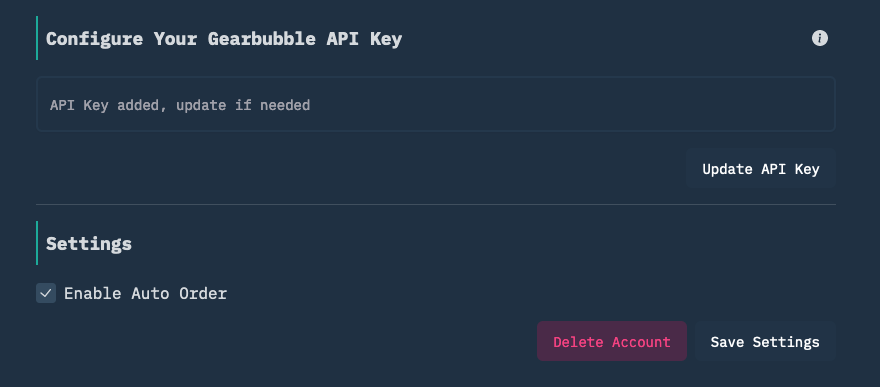
Step 7: Connect CustomCat and Laser Chili for Fulfillment
In the "Suppliers" section, you'll find instructions to connect CustomCat and Laser Chili.

- Sign up for CustomCat and Laser Chili accounts to get your API Keys.
- Insert the API Keys into PODtomatic to automate the fulfillment process.
✅ That's it!
You're ready to start selling on Amazon with PODtomatic! 🚀 Rest assured, PODtomatic will start creating and uploading products to your Amazon account within the next 24 hours.
Don't worry — we've made these steps super simple to follow inside the PODtomatic system. Just follow the instructions, and you'll be all set up in no time. Once you've completed these steps, PODtomatic will handle the rest, making the process seamless and efficient.
Still have questions? Contact our support team for help getting started.